There’s no doubt that WordPress security is vital. In the end, a security breach could cause serious harm to your website. But, when hackers use bots to swiftly and efficiently attack websites, it could seem like the odds are against you.
There’s an easy tool that you can utilize to keep spammers and bots from your WordPress website. Implementing a Completely Automated Turing test that can tell Computers and Humans Apart (CAPTCHA) is a straightforward, easy way to improve the security of your website.
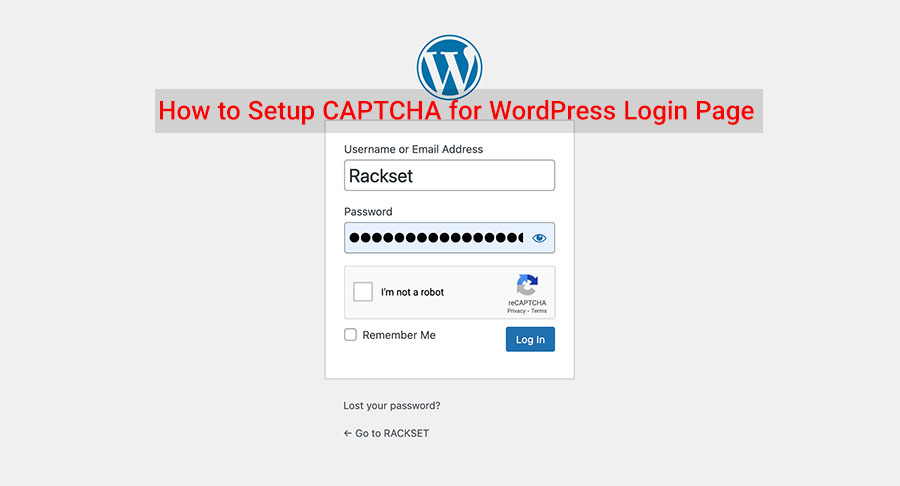
In this article, we’ll discuss how to enable CAPTCHa on the WordPress login page. This can be done via the Secure WordPress hosting support team, or you can install the CAPTCHA plugin in WordPress yourself.
What’s CAPTCHA?
The Completely Automated Public Turing test to determine Computers and Humans Apart, also known by the name of CAPTCHA, is a test created to identify if the user is a human as opposed to a bot.
This test differentiates humans from computers by analyzing various aspects of user interaction. The manner in which the CAPTCHA functions is dependent on the kind of CAPTCHA the system is using. The most well-known ones that are currently in use include the following:
reCAPTCHA v2
reCAPTCHA v2 requests users to select the “I am not a robot.” checkbox or the complete images CAPTCHA tests. The system analyzes the user’s actions to determine whether or not the individual is a human or a bot.
ReCAPTCHA v3
This version of reCAPTCHA analyzes how users interact with your site. Then, it calculates an assessment of how authentic (or fake) the visitor is. A higher score indicates that the user is more likely to be real.
In contrast to reCAPTCHA v2, it functions behind the scenes. Therefore, your forms will not display images of CAPTCHAs as well as “I am not a robot.” Checkboxes. This may be the best CAPTCHA for WordPress available.
HCAPTCHA
HCaptcha’s design is like ReCAPTCHA. It’s only difference is hCaptcha does not offer user information to a third party.
The primary function of CAPTCHAs is protecting the website from spammers as well as data extraction. This security extends to login and registration forms when you add CAPTCHA to the registration forms.
Thus, with CAPTCHA security on login and registration forms, you can prevent spam registrations by ensuring that only real users register on your website. Bots can be prevented from accessing your website’s comment or review sections by removing the registrations that are spammy. You can protect the accounts of current human users by blocking fraudulent attempts at login.
With all the benefits that come with it that are available, it’s a good idea to increase WordPress security by including CAPTCHAs on login and registration forms. A reliable WordPress login form or registration plugin, as well as a CAPTCHA plugin, will accomplish the job.
What Are the Reasons Why Spam Bots Can Hurt Your Website

Spambots are not a great option to include on a site. In the beginning, they could boost your website’s visitors number as well as registrations. At the same time, experienced web designers may recognize this as normal, but newcomers don’t. In fact, they might think that their website is expanding.
This can cause them to invest more in resources as they think that it will be a good investment. This could have severe economic consequences.
The comments section can be an intriguing place to learn about various opinions on a topic. However, it can also be an easy place for spambots to promote different products or websites. If only a portion of the comments is focused on the topic and the other half are all about advertising for other websites, it can seriously hurt the conversation on a blog.
This is avoided by implementing the WordPress CAPTCHA registration plugin in the comment area. This will ensure that bots can’t post a comment if they have not passed a CAPTCHA test.
How to Enable CAPTCHA on WordPress Login Page
In terms of WordPress security, including a CAPTCHA is one of the easiest ways to make it difficult for bots to get into your website. It’s good news that adding one isn’t difficult. It is possible to set up your system with just three steps.
1. Install CAPTCHA Plugin in WordPress
The easiest way to add a CAPTCHA to your WordPress website is by using a plugin. There are numerous premium options available on the WordPress Plugin Directory, so you don’t have to spend a fortune to give your website security enhancements.
When you are deciding on a plugin, there are some key aspects to take into consideration.
First, you must register for the kind of CAPTCHA your plugin uses. Most of the best CAPTCHA plugins for WordPress work with Google’s CAPTCHA. Thus, you’ll need to add Google CAPTCHA to the WordPress login page. Don’t worry; we’ll teach you how.
In addition, you’ll need to ensure that your plugin is able to incorporate CAPTCHAs into various sections of your website and not just on the login page. This idea will be discussed further in the next step. In the meantime, keep in mind that whenever there’s an online form, you’ll likely need to discourage bots from using a CAPTCHA.
Let’s take a look at three plugins that satisfy the above requirements. Google Captcha (reCAPTCHA) by BestWebSoft is the most well-known choice, with more than 200k active installations. As the name suggests, it incorporates either a v2 or Google ReCAPTCHA on your registration and login pages, contact and password reset forms, as well as in your website’s comments and testimonial submissions. This prevents spam and also improves security.
Advanced noCaptcha and Invisible Captcha are also highly reviewed and come with some of these features. The plugin also provides multisite compatibility and is compatible with the most popular membership tools, such as bbPress or BuddyPress. In addition, you can include multiple CAPTCHAs on a single page if you need to.
Additionally, you might be interested in Login No CAPTCHA ReCAPTCHA. The plugin comes with the simple Google ReCAPTCHA, which is suitable for login, registration and forgetting password requests. However, it isn’t able to integrate with your comments or contact form, making it less comprehensive than the two other plugins we’ve examined.
2. Create Your Google ReCAPTCHA, and then Add It to Your Website
After you’ve installed and activated a WordPress CAPTCHA plugin, you’ll be required to register your Google ReCAPTCHA account (assuming you’ve chosen the plugin that has one). Visit the Google reCAPTCHA administrator console and then fill out the registration form.
It is important to note that you’ll have the option to select between a V2 or v3 reCAPTCHA. You can opt for a checkbox or the invisible test. This will give you the most efficient UX because it doesn’t require any action on the users’ part. The v2 checkbox tends to be more reliable.
After you’ve completed all the fields, click on the button to submit it. The next screen will appear and you’ll be presented with the site key and a secret key.
Both of these must be entered in the CAPTCHA configurations on your WordPress website. This procedure may differ depending on the plugin you select. But you should be able to locate the settings on the sidebar of your dashboard. Copy and paste your credentials into the appropriate fields.
Make sure to save your modifications. You might also want to save the Google reCAPTCHA administration console page and make sure to check frequently. Once a sufficient number of live visitors have been to your website, it will be possible to analyze the data associated with the form submissions.
3. Configure Your Settings to Protect Key Zones
As we’ve already mentioned, there are a variety of places that are ideal for the integration of your CAPTCHA in order to offer the highest level of security to your website. After you’ve installed the plugin of choice, you’ll be able to modify your settings to be sure that all the important pages are protected.
Google CAPTCHA and Advanced No Captcha both come with the following checkboxes in their general settings. In the settings, you can select which locations you’d like to utilize your reCAPTCHAs.
Ideally, this should comprise any forms you’ve on your site, which includes the most vulnerable ones like your:
- WordPress administrator login page
- WooCommerce login page
- Form for user registration
- Password Recovery form
- Contact form
Your website may also include distinctive forms, like surveys, content submitted by users or even email sign-ups. In these instances, it is possible to use Advanced noCaptcha and Invisible Captcha, as that plugin has action hooks that allow for incorporating the Google reCAPTCHA into any form.
You can also opt to invest in Google Captcha (reCAPTCHA) Pro instead. It offers additional integrations with popular plugins, such as Jetpack and MailChimp for WordPress as well as a number of forms.
The addition of a CAPTCHA on Your Login Page
The login screen of your website is a major attack target for brute force as well as Cross-Site Scripting (XSS) attacks.
To add a captcha to it using the Google Captcha plugin, navigate to Google Captcha > Settings > General > Enable ReCAPTCHA within WordPress and then choose the Login Formula Under WordPress default settings.
Your Login page is now secured.
Integrating a CAPTCHA on your Password Reset Page
So, how to enable CAPTCHA on the WordPress login page? If hackers’ attempts to log into your website are unsuccessful, they could get a website that allows users to make changes to their passwords. To include a CAPTCHA on your site to secure this page, go to Google Captcha > Settings > General ReCAPTCHA to enable it on the dashboard of your WordPress dashboard.
Then, choose the Reset password option on the WordPress default list.
Secure Your WooCommerce Login Page by introducing A CAPTCHA
Your WooCommerce Login Page is as susceptible to attack by malicious hackers as your main WordPress page. To secure it using Google Captcha, you’ll need the premium version of the plugin (below in yellow). Once you’re done, go into Google CAPTCHA Settings > General Set up reCAPTCHA within the WordPress dashboard:
In this section, you’ll be able to choose the WooCommerce Login Form within the External plugins list.
Applying a CAPTCHA to Your Contact Form
Contact forms could be secured with the help of a CAPTCHA similar to the other ones we’ve talked about in this post. There are, however, a variety of different forms of contact that work with Google CAPTCHA, such as:
- Contact Form 7
- Jetpack Contact Formula
- Ninja Forms
You’ll need one of the tools above running on your website for you to add a CAPTCHA feature to your form for contact. You can then go the Google Captcha General Settings > Settings > Enable reCAPTCHA and then click the checkbox for your chosen plugin:
It will finish the process. If you are using a different contact form plugin that you use on your WordPress site, you could think about installing another CAPTCHA plugin that is integrated with it. There are some form builder plugins that integrate CAPTCHAs by themselves, like WPForms.
Conclusion
The removal of malicious bots from your site is crucial in order to safeguard your site’s content, customers, and reputation as a brand. One of the simplest ways to reduce their speed is to add an authentication process called a CAPTCHA on your WordPress web page’s forms.
- The addition of CAPTCHA to your WordPress site is just three steps:
- Install and activate the plugin for WordPress. CAPTCHA plugin.
- Create your Google ReCAPTCHA and then include it on your website.
- Set your settings to secure important areas.
Other than installing the CAPTCHA plugin in WordPress, you need to have secure WordPress hosting in order to fully secure your WordPress website.


Leave a Reply