WordPress is the world’s best CMS with over 40% of the websites on the internet being powered by WordPress. WordPress’ simplicity and open-source allow it to be modified however you wish. There are thousands upon thousands of WordPress plugins that can take care of your modification process with a simple click. In this article, we would like to discuss customizing WordPress reset password form the front-end without a plugin.
As you may know, a plugin can take a toll on your WordPress server, especially if your server is shared with other websites. You don’t need to install a plugin for every single customization you want to make to your WordPress website. The frontend reset password is considered to be one of the most used pages on any WordPress website as people tend to forget their passwords all the time.
Why and How to Customize WordPress Reset Password Form?
Your WordPress website has an advanced administrator system to manage users and web content. It lets users create an account as a user login, sign in, and change their password. And in some WordPress websites, users are allowed to create their profiles and communicate with other users.
By default, the reset password on WordPress displays the WordPress logo and it’s alright if you want to have your colleagues log in to the admin page. However, if you’re operating an eCommerce store or membership site, your customers also have to sign in.
You can provide a more enjoyable user experience by customizing the user interfaces to reflect your theme, feature your company’s logo, and provide additional information.
There are plenty of guides on custom WordPress website design and how to customize the WordPress reset password form. But in this article, we would like to get in-depth of a custom WordPress website development and how to properly customize the WordPress reset password form.
Let’s look at ways to personalize this page to provide an enhanced user experience that is more consistent. We’ll go over three options:
- Method 1: Customizing Reset Password Page Using Formidable Forms
- Option 2: Customizing Password Reset Page using Theme My Login
- Method 3: Reset the Password Logo using Plugins or Code
Method 1: Customizing Reset Password Page Using Formidable Form

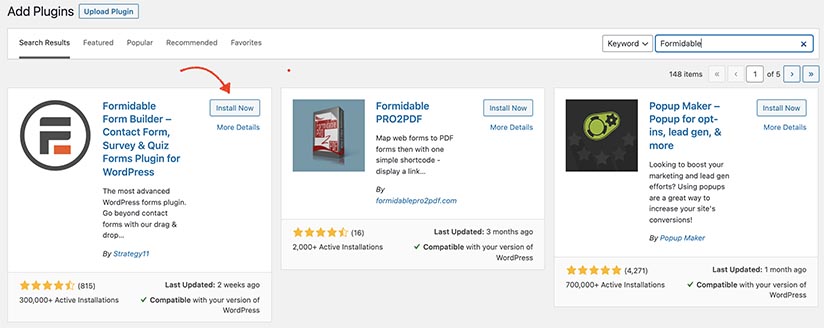
In the beginning, you must download the Formidable Forms plugin. Formidable Forms is one of the most sophisticated WordPress form plugins on the market. Although it’s available as a free version, you’ll require a Pro account to set up a password reset page. This is a must if you are planning on starting a membership site.
Once you have activated the add-on, you’ll have to go through your formidable plugin page. You will need to look to find the User Registration add-on that will be required to include a login screen and account reset page on the main of your site.
After you’ve found it click the activate button to enable the extension.
You’re now ready to create an individual website to reset your password.
Go on to Page > Create New to make a brand new page. After that, you must name your page and then type in the shortcode [frm-reset password*] in the WordPress editor for content.
Be sure to include any additional content that you wish to show on the page. Then, press the Publish button located at the top-right on the page.
Last but not least, ensure that WordPress will utilize this page when you reset the password. To do this, head to Formidable global settings and click the “Registration” tab from the menu.
From there, you must look for the Reset Password page. Then, simply select the page that you just created from the drop-down menu.
Make sure to click the Update button located at the right at the very top to save your settings.
Now, you can go to your site to view the page for customizing passwords in motion.
Option 2: Customizing Password Reset Page Using Theme My Login

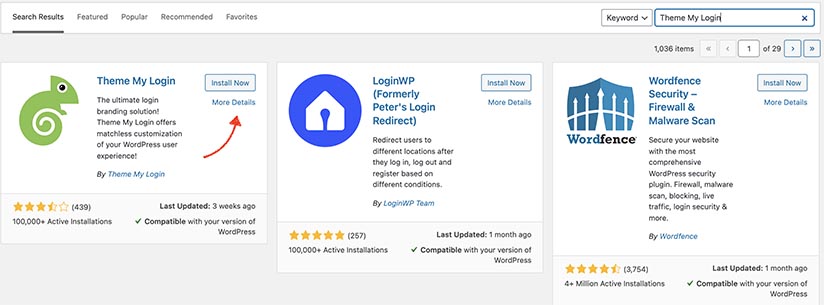
Theme My Login isn’t extremely customizable compared to other plugins, however, it is an easy and inexpensive option to modify the login page and password reset pages to fit your WordPress theme.
The first thing to setup and enable is The Theme My Login plugin. After activation, Theme My Login automatically generates URLs for your customized login to log out, register, forget the password, and then reset the password.
You can modify or view these URLs by going to the ThemeMyLogin General page. You can scroll down until the section titled ‘Slugs’ to alter the URLs that are utilized by the plugin for login actions.
Look at the slugs “Lost Password” as well as “Reset Password’. We’ll disable the default settings and then begin with a fresh Lost Password page.
Go to the Page > Add New to make a brand new WordPress page. Next, you need to give your page a title and then enter the following shortcode [theme-my-login action=”lostpassword”] inside the content area.
It is also necessary to modify the URL slug of the page to lost password for the Theme My Login will redirect the username URL onto this one.
After you’ve completed adding any additional information you’d like to include to the page, press the “Publish” button, and then preview it to view your customized login page in motion.
The next step is to go through the same process again to design an individual WordPress password reset page. It is necessary to include the code “[theme_my_login]” action=”resetpass” to the page’s content, and add resetpass to the text of the page, and then change the URL slug into lostpassword.
Method 3: Modifying Reset Password Logo with Plugin or Code

There is no need to create a customized WordPress account page on your site. A lot of sites simply change their logo and WordPress logo and URL and use an existing login page.
In the final part of our tutorial on WordPress reset password form front-end without plugin article, we talked about plugins, but what if you don’t want to install a plugin to customize the WordPress reset password form? We will show two options to replace the logo on the login screen with your logo by using code.
This technique lets you substitute the WordPress logo displayed on the login screen using your logo.
The first step is to upload your logo to the library of media. Visit the Media > Create New page, and upload your customized logo.
Once you’ve uploaded your image, click the Edit link on the right. The edit media page. Here, you must copy the URL of the file to paste it into a text file that is blank on your personal computer.
Next, you need to add the following code to your theme’s functions.php file, or to a site-specific plugin.
function login_logo() { ?>
<style type=”text/css”>
#login h1 a, .login h1 a {
background-image: url(http://path/to/your/custom-logo.png);
height:100px;
width:300px;
background-size: 300px 100px;
background-repeat: no-repeat;
padding-bottom: 10px;
}
</style>
<?php }
add_action( ‘login_enqueue_scripts’, ‘login_logo’ );
Remember to replace the URL for your background image with the URL of the image which you have copied previously. You may also alter the other CSS properties to make them match your logo image.
Now, you can visit this WordPress Login page and view your personalized logo being used.
This code is only used to replace it with the WordPress logo. It doesn’t alter the link to the logo that links towards WordPress.org. WordPress.org website.
Let’s make this change.
Add the following code into your site’s functions.php file or to a website-specific plugin. This code can be added just below the code you previously added.
function login_logo_url() {
return home_url();
}
add_filter( ‘login_headerurl’, ‘login_logo_url’ );
function login_logo_url_title() {
return ‘Your Site Name and Info’;
}
add_filter( ‘login_headertitle’, ‘login_logo_url_title’ );
Make sure to replace the ‘Your Site Name and Info” with your website’s real name. The logo that you’ve created displayed on your login screen will direct you to your website’s homepage page.


Leave a Reply