If you have experience in the web hosting industry, you are probably aware that you can earn money by creating and hosting websites for other website owners who are just starting out.
The greatest aspect is that you are not required to establish a web hosting business to allow people to buy reseller hosting. You may just sign up for a virtual private server (VPS), a dedicated server, or buy a reseller hosting account, and let your web host’s huge servers handle the rest. But how is this possible? In this article, we would like to discuss that. This can be done with WHM.
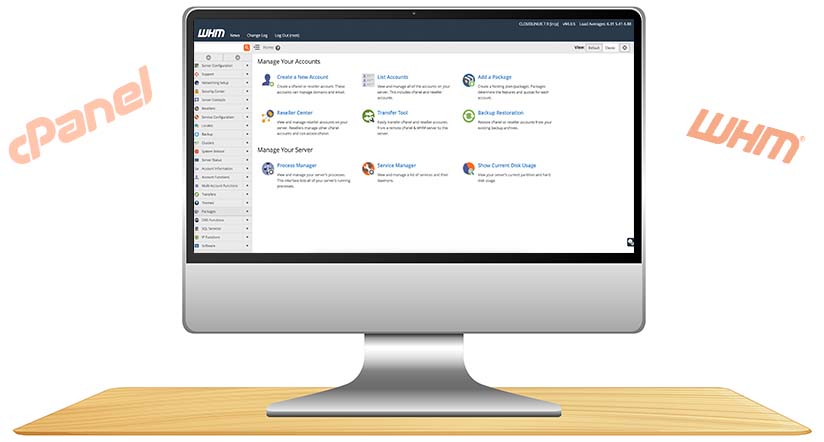
What Is WHM?
So, what is WHM? WHM (Web Host Manager) gives administrators access to cPanel’s backend. Yes, one may go even “deeper” with their server access than cPanel. Indeed, the Web Host Manager for your account acts as a manager for any cPanel administrators that fall under its scope. This is especially useful for resellers, but everyone with a hosting account should be acquainted with WHM’s capabilities.
To begin, if you’re a reseller, you’ll be pleased to learn that you may trademark your WHM environment. This is critical for marketing reasons to avoid the appearance of utilizing a standard vendor template. Additionally, you may automate many administration activities that would be time-consuming otherwise.
The ability to develop and manage user accounts enables you to provide cPanel access to your customers’ sites while maintaining high-level control over each individual site through a cPanel running on your VPS or dedicated server. This effectively transforms the server for which you pay a monthly fee into an apartment complex, with the cPanel access you give your customers serving as the keys to their individual apartments. How to create cPanel with WHM?
Do you need to read more about WHM? Take a look at this blog: What Is Web Host Manager
How to Create cPanel with WHM?
In exchange for signing up for VPS or dedicated web hosting, you will get an unlimited number of domains for yourself and your customers. Not to mention that you have complete control over how you bundle your customers’ plans and how you modify cPanel access to your desire.
1. How to Build a Package in the WHM Administration area
To get started, you’ll need to establish a package on your WHM account for each customer who will be using cPanel. Let’s go through the basics: when you build a package, you specify predefined specifications that grant a user or domain access to different functionalities.
By navigating to example.com:2087, you may log in to your WebHost Manager account. The servername:2087 or ip.add.re.ss:2087 may be used to access your WHM account if your domain is not linked to the server.
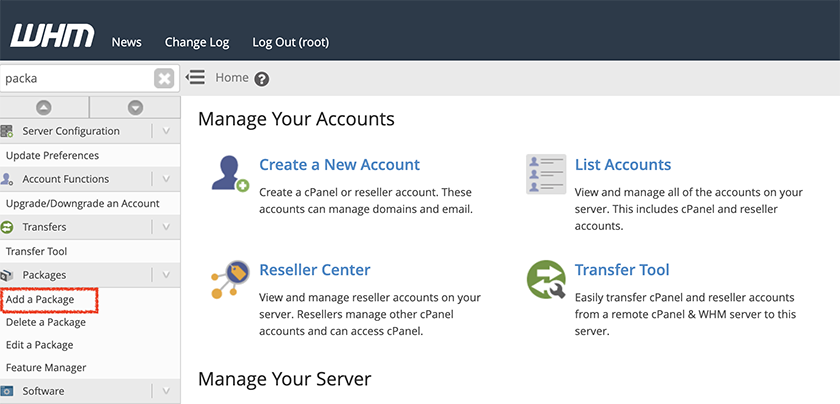
Find the left search box and put in “Add a Package,” or go down the left side menu until you find “Add a Package,” and then click on it to complete the process.
Fill in the blanks with your Package Name.
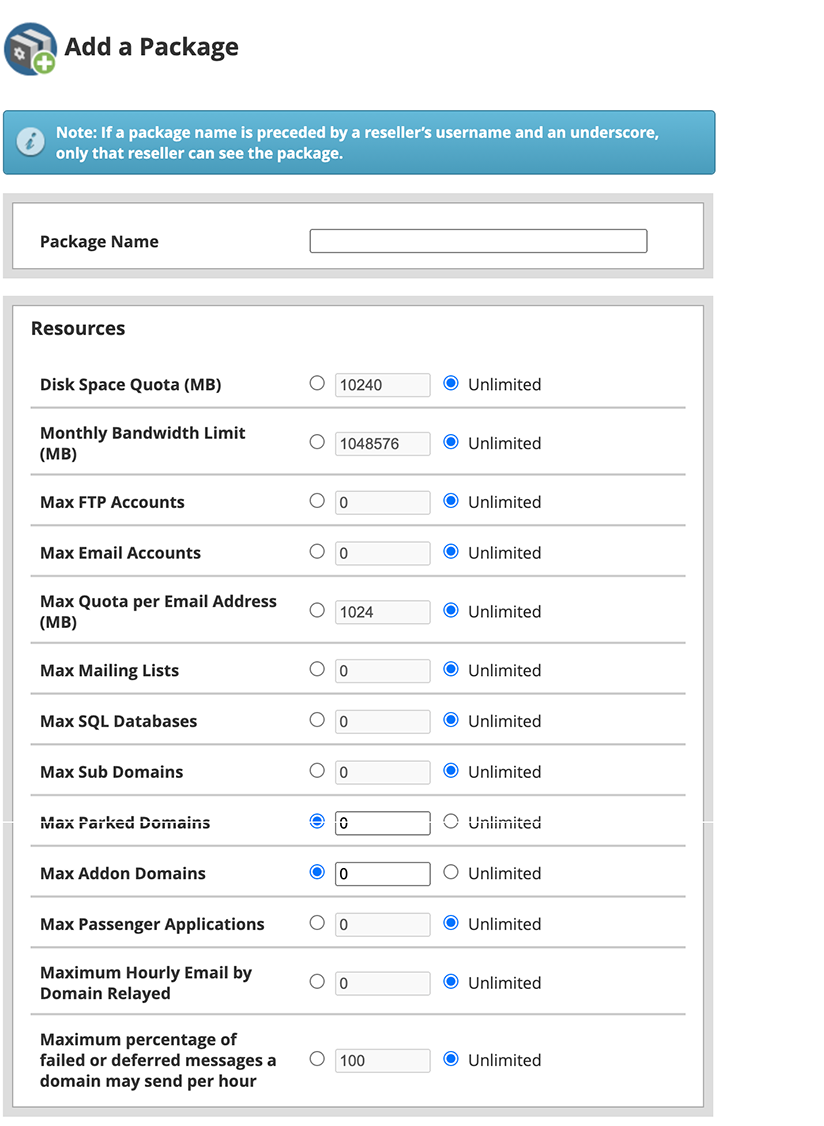
Fill in the blanks in the Resources section, making it unique to your package plan. The following are suggested quantities for a simple WordPress site:
- Monthly Disk Quota: 1000 – 5000 GB. Bandwidth: 5000 – 10,000 bits per second
- Maximum number of FTP accounts – infinity
- Maximum Number of Email Accounts – Infinite
- Maximum Number of Email Lists – Infinite
- Maximum Number of Databases – Infinite
- Maximum number of subdomains – infinity
- 1 domain name is the maximum number of domains that may be registered.
- 1 maximum number of addon domains
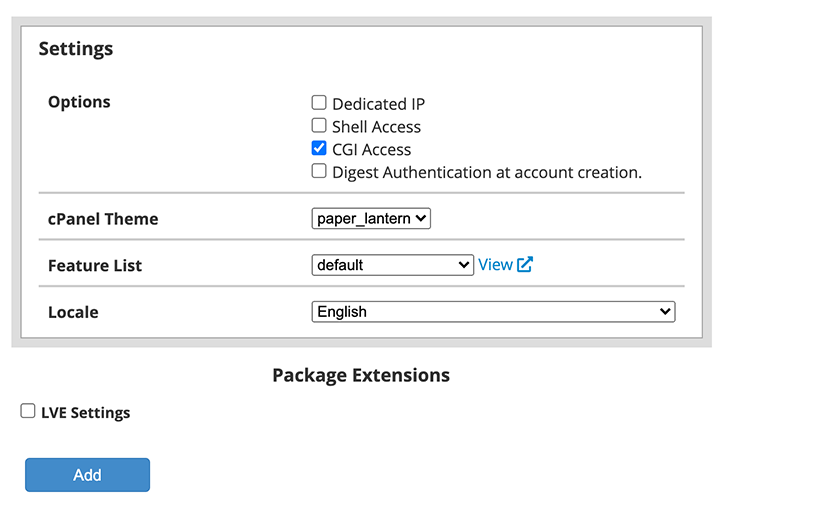
- After that, you may make changes to your preferences.
- As soon as you’ve completed all of the Resources and Settings sections, click on the “Add” button located at the bottom of the page to save your changes.
Return to the WHM page by clicking the WHM logo in the upper left corner of the page after that.
To proceed to the next section, enter Upgrade/Downgrade an Account in the text box provided.
Select your domain name and then click the Modify option to make changes.
Click on the Upgrade/Downgrade option once you have selected the name of your new plan.
That’s all there is to it when it comes to putting up a bundle.
If you’re a reseller, it’s a good idea to develop many different packages. This provides your customers with more options, allowing them to choose the hosting package that best suits their needs.
2. How to Set Up a cPanel Account via the WHM Interface
Following the creation of your packages, it’s time to move onto the more interesting part of the process—creating your cPanel accounts.

The following are the steps to get you started:
- Log in to your web host manager (WHM) account.
- Click on “Create a New Account” in the middle of the dashboard to begin the process.
As an alternative, you may use the search box located in the top left corner of the screen to put in the word “create” and then choose “Create a New Account” from the drop-down option that appears.
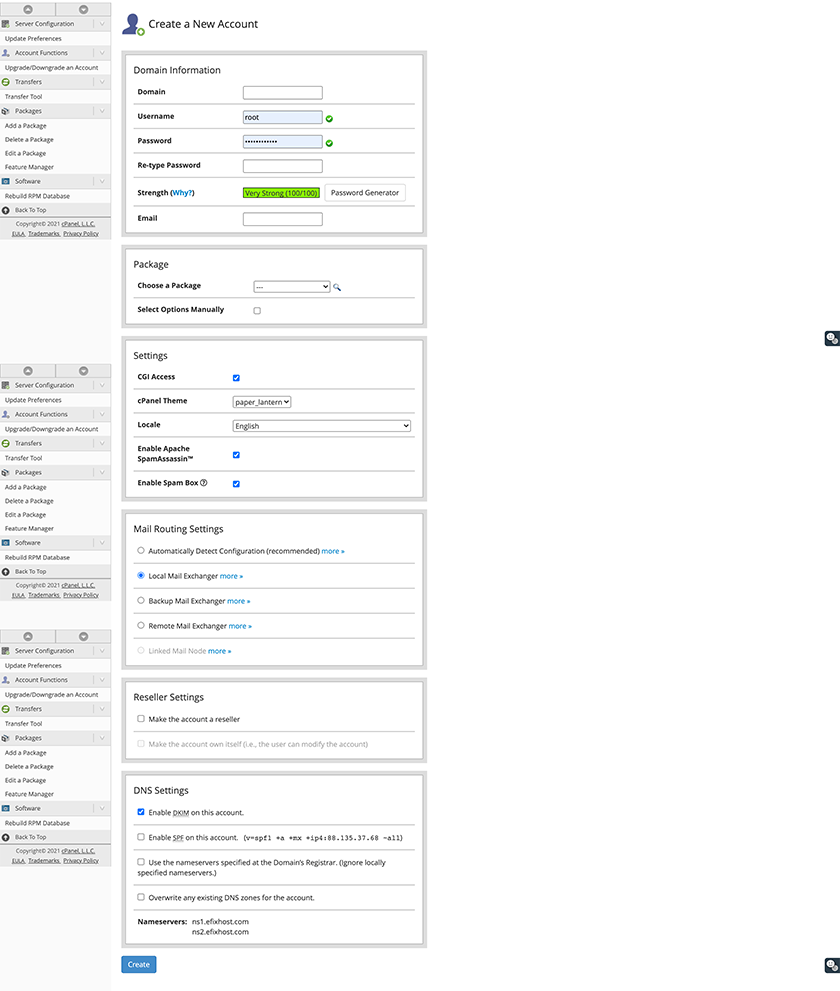
Following that, WHM will ask you for domain information, which will include:
– URL (Uniform Resource Locator)
– Username Password Confirmation of the password
– Admin email address
– Following that, choose a package for this specific cPanel.
– Fill up the blanks with your preferences.
– Select the Mail Routing options that you want.
– Specify whether or not you would want this account to be a Reseller account.
– Finally, choose your DNS configurations.
– Then, after you’ve finished configuring your preferences, click “Create.”
Scroll down a little farther and you’ll see a section labeled “New Account Information.” Click on this link to learn more. All of this information should be copied and pasted into an email and sent to your customer.
Alternatively, you may return to the top-left search option and put in “list” to get a list of all of your cPanel accounts.
When you choose “List Accounts,” you will be presented with a list of all of the cPanels that are currently active in your WHM, making it simple to find the information you need to send to your customers.
3. How to Choose cPanel Themes for Your Customers Using the WHM Interface
You undoubtedly observed that one of the choices available when setting up your first cPanel account was to choose a theme for the control panel.
If you don’t like the default theme, you can always change it. However, you have the option of customizing the theme for your customers.
Here’s how it’s done:

- Log in to your WHM account.
- Look for the term “cPanel” in the search box located at the top left-hand side of the page.
- When the cPanel category opens, choose “Customization” from the drop-down menu.
- You’ll see that the “Customization” portion of the dashboard’s main area will begin to fill as a result of this action.
- You’ll also see a number of other tabs. Select the “Customize Style” tab from the drop-down menu.
- Once you’ve arrived, you may select from a variety of themes, including Basic, Dark, Light, and Retro. Basic, Dark, Light, and Retro are the most popular.
- To choose a default theme, click on the “Set as Default” option next to the theme you like.
- Once you’ve decided on a theme, you’ll be prompted with a green confirmation button.
If you want to be really fancy, you may also manually modify a theme. Simply download your chosen style, make any necessary changes, and re-upload the theme.
Conclusion
That’s all there is to it! If you’re ready to begin maintaining websites for a variety of customers, now is the time to do it. There are many hosting providers that offer the ability to buy reseller hosting and start working on your business as a hosting provider yourself.


Leave a Reply