You cannot access websites without first connecting to the Domain Name Server (DNS). When you do this, you could be confronted by a message that reads, “DNS server not responding.” This indicates that the decentralized DNS system responsible for translating hosts’ names into IP addresses did not manage to respond.
There are many reasons why these kinds of DNS errors could occur. However, the majority of them are simple to fix. Solving the issue might be as simple as restarting your PC or switching web browsers.
In this article, we’ll discuss what causes DNS servers to be unavailable, how to fix DNS server issues and finally, what is a DNS?
What Is a DNS?
DNS, also known as Domain Name System, is a directory used to convert hostnames or domain names to the IP (Internet Protocol) address. DNS lets users connect to any website within a few seconds and surf the web. But, systems with problems regarding their DNS server cannot operate web pages or connect to the Internet.
DNS server is unavailable is the most frequent error that could occur when you buy a Windows VPS server. The error indicates that the system can’t connect to web pages because it cannot properly connect the hostname and domain names.
The error can be seen due to various reasons, such as faulty internet adapters or incorrect DNS addresses. So, there’s not only one issue you’ll encounter when trying to fix it.
But it’s not difficult to recognize and fix the issues you face if you know the right ways to solve them.
What Does “DNS Server is Not Responding” Error Mean?
The error signifies that the system could not connect to the Internet as it could not establish a connection to the DNS and thus could not connect to access. There are many different ways to approach trying to solve this issue.
In the case of internet connectivity, many people attempt to restart their internet router because it might be a problem with the configuration, which they can fix immediately. In other situations, users are also tempted to reboot their computers to ensure that their system is connected to the Internet correctly.
What Can Cause DNS Server Not Responding Error?
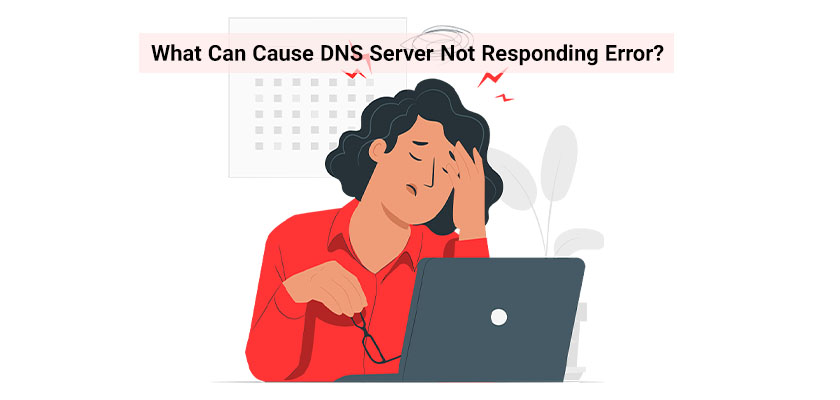
Here’s a list of possible causes for a DNS Server connectivity issue:
- Inaccessible DNS provider: Heavy usage and server failure are common backend problems that could stop your device’s access to the Internet.
- Problems with Modem or Router: Problems with the modem or router can cause DNS server problems. There are a variety of solutions, such as looking at the Ethernet ports and cables to identify the root reason for the issue.
- Hardware and Network Issues: Hardware problems can also lead to DNS Network connectivity issues. For instance, if a server isn’t able to properly transmit the data to the subsequent server.
- Antivirus Problems: Issues that arise with Antivirus software can also prevent internet connections from working in a proper manner.
Now you may ask yourself, “how do I fix DNS not responding?” Although these easy fixes might be effective for some users, not all users will profit from these fixes. Let’s look at some of the most effective solutions to resolve your DNS server not responding error that could appear on your PC systems. And hopefully, by the end of this article, you will have your “how can I reset my DNS server?” question answered.
How to Fix DNS Server Not Responding

Below, we’ve listed the methods you can attempt to get rid of your “DNS Server Not Responding” error. The following paragraphs of this post offer details of the various methods available:
- Use a Different Web Browser
- Try accessing a website on a Different Device
- Restart your router
- Investigate Possible Network Issues
- Manually set your DNS Server
- Clear the DNS Cache
- Disable Internet Protocol Version 6
- Temporarily disable your Firewall and disable your Antivirus Software
- Restart PC in Safe Mode
Use a Different Web Browser
A possible alternative to solving the DNS Server not Responding issue that’s very easy is to access the appropriate website with an alternative browser.
If, for instance, you’re using Mozilla Firefox as your primary browser when the issue arises, you can try another browser, such as Google Chrome, to access the appropriate site.
If switching to a different web browser resolves the issue, make the one that works as your default. However, if the issue persists, then we are, at a minimum, aware that the browser you’ve used isn’t the cause.
Try Accessing a Website with a Different Device
Try using an alternative device that is connected to the internet connection to connect to the web page that you attempted to access after receiving the error.
For instance, you can make use of Wi-Fi through your phone to connect to the appropriate web page. If the problem persists, it is likely that the issue isn’t merely on your primary device, and the issue could be related to doing with your router.
Restart Your Router
This “DNS Server not Responding” problem may be due to the data flow. It is possible that restarting your router will solve the problem.
It is possible to restart your router simply by pushing the power button. After that, you can unplug the router’s power cord. It should take about 30 seconds before plugging your router back into the power outlet and then pressing power to turn it on.
Investigate Possible Network Issues
Network diagnostics can indicate that network issues are the primary cause of the problem.
Operating Network Diagnostic is very easy to do for Windows 10 OS. You can do this using these steps:
- Open Control Panel. One method to do this is to press Windows Key + R to open “Run” in the “Run” box and enter “control”.
- Choose from the Network or Internet option that is displayed in the Control Panel window.
- Click on the Network as well as Sharing Center option from the “Network and Internet” window.
- Click on the Troubleshoot issues option located beneath “Change your network settings head into the “Network and Sharing Center” window.
- Click Other troubleshooting options, click Additional troubleshooters Internet Connectivity, click Internet Connections and use the Troubleshooter.
The next step is to sit and wait for the troubleshooter’s task to complete. If you receive any error messages, just follow the steps to fix the specific network problem.
Manually Set Your DNS Server
The reason for your problem could be the DNS server you’re using is not working. In this scenario, you’ll be happy to know that you’re capable of changing to a different DNS server. Now you may ask yourself once again, how can I reset my DNS server? You can alter your DNS server to the following: Google’s Public DNS and Cloudflare DNS public. To switch your DNS server, take these steps:
- You can invoke the Control Panel. Another way to access the Control Panel is to activate the Start Menu and then look at your Control Panel.
- On the Control Panel window, click the Network and Internet options.
- Within the Network and Internet window, select the Network as well as Sharing Center option.
- In the Network and Sharing Center window, select the active connection. For example, click on the “ethernet” option if this is the current connection being utilized or select the “Wi-Fi” option if it is evident that this is the active connection.
- The dialog box displayed select on the “Properties” button.
- In the dialog that’s presented to you, an array of items is listed beneath “The following items”.
- From this menu, choose the option labeled “Internet protocol version 4 (TCP/IPv4)” and then click the “Properties” button.
- You’ll be presented with a second dialog box, which will display two fields. One field will be labeled “Preferred DNS Server”, and the second one that’s directly beneath that field will be marked “Alternate DNS Server”.
- Then click first on the Use the DNS server addresses below the radio button.
- To access Google’s Public DNS server, enter 8.8.8.8 in the field labeled “Preferred DNS Server” and put 8.8.4.4 into the area labeled “Alternate DNS Server”.
- Additionally, you can use the DNS server of Cloudflare for the same reason. Cloudflare DNS address is 1.1.1.1
- Once you’ve entered the intended DNS setting for the server, be sure that you check the “Validate settings upon exit” checkbox.
- Select the “OK” button to save your updated DNS server settings.
- Make sure to restart your system.
Clear the DNS Cache
You can clean the DNS cache, which could help to resolve issues with the “DNS Server not Responding” problem. This will remove IP addresses as well as other DNS-related information from your cache. Even if you buy a Windows VPS server, you may need to clear the DNS cache by running a command on a command-line prompt.
One method of launching this command prompt would be pressing the Windows keys and R to bring up the “Run” box. In the “Run” box, type “cmd” then press Shift+Ctrl+Enter to open it as administrator.
On the command line, type “ipconfig /flushdns” and then press Enter. If the command is successful, you’ll see an appropriate message displayed within the Command window.
Disable Internet Protocol Version 6
As of the writing time of this post, Internet Protocol Version 6 is the most recent version available for internet protocols. Enabling Internet Protocol Version 6 will not cause any harm to your computer’s performance, but it has been reported to resolve issues with the “DNS Server not Responding” problem.
To turn off Internet Protocol version 6 on Windows 10, follow these steps: Internet Protocol version 6 on the Windows 10 operating system, simply do these things:
- Go to Control Panel -> Network and Internet -> Network and Sharing Center
- Click on the appropriate connection, such as “Wi-Fi”
- Hit “Properties” or click the “Properties” button on the dialog box that is displayed to you.
- In the list that is presented beneath the “This connection uses the following items” heading, remove the item that is labeled “Internet Protocol Version 6 (TCP/IPv6)”.
- Click “OK”
Temporarily Disable Your Antivirus Software and Firewall
If switching browsers fails to solve your “DNS Server Not Responding” problem, the second step will be temporarily disabling your Firewall. Firewalls and antivirus software are crucial to protect your devices; however, they can cause issues that can affect your network connection.
How Do I Temporarily Disable My Antivirus Software and Firewall?
For Windows users, it is possible to do this by opening your control panel and going to Update and Security Windows Security > Virus & Threat Protection > Manage Settings.
Mac users can access this option by going to System Preferences > Security and Private and Firewall.
If your Firewall is disabled, try visiting the site in your browser. If that resolves the issue, you may think about switching to a different antivirus program or resetting the settings of your current application. Whatever you decide to do, be sure to activate your Firewall when you’re completed.
How Do I Disable Secondary Connections?
To accomplish this within Windows, start by typing “Network connections” into the search box on the taskbar of your desktop. Then, click “View Network Connections”:
This will take you to the network Connections webpage. The connections you’re not currently using will be marked with green (X) on them. Click on the right-click icon, and select the option to disable:
Repeat the process for all other connections that aren’t yet active. Once you’re done, reboot your browser and attempt to access the site again.
If you’re running the macOS version, you can do this by clicking the Apple icon and then going to Network > System Preferences. Your network connections will appear on the left-hand side of the screen.
To deactivate or disconnect one, choose it and then click the (-) icon on the right side of the screen.
Restart PC in Safe Mode
A system that isn’t properly functioning can lead to a “DNS server not responding” error message.
To determine if this issue makes the DNS server inaccessible, you’ll have to reboot your PC using the safe mode , which is a stripped-down version of the operating system that limits the number of files and resources utilized to run your device.
Here are the steps to begin the PC in safe mode using Windows:
- Click on the Start menu and select the Power button Press the Shift key and then select Restart.
- In the Select one of the options window, select Troubleshoot and then Advanced Options.
- Choose your Start Settings option in the Advanced options and then click Restart.
- Click the key F5 on the keyboard to choose the safe mode that includes the network option.
If you’re running a Mac, here’s how to start your computer up using safe mode:
- Go to your Apple menu, then shut down. Wait for around 10 seconds after your device shuts down.
- Switch up your Mac and then hold and press your shift key until you can see your login display.
If your network connections work when you are in Safe Mode, it indicates that software from a third party could be the cause of problems with the “DNS server not responding” problem. To fix this issue, it is necessary to locate and eliminate the program on your computer.
Conclusion
A DNS server not responding message indicates that your browser is unable to access the Internet. This is usually because of DNS errors or network problems.
Here’s how you can solve your “DNS server not responding” problem:
- Troubleshoot network issues. Run network diagnostics to find and fix issues with internet connectivity.
- Start the modem or router. Clear your router’s or modem’s cache by pressing the power button and disconnecting its power cable.
- Disable your Firewall and antivirus. Disabling your antivirus temporarily and firewall software could aid in resolving the DNS problem.
- Clear DNS cache. Clear the cache on the router in order to update the DNS configuration.
- Change your DNS Server Address. Replace your ISP’s address with a new DNS address.


Leave a Reply