
As the owner of a website, you must ensure that your site is quick and secure. Cloudflare is a reliable tool to assist you in achieving these goals through the Content Delivery Network (CDN) as well as other security features. In this article, we’ll walk you through the steps needed to add a domain to Cloudflare to increase your website’s security.
Why Should You Add Your Website to Cloudflare?
Before we go into the process, we’ll go over the reasons to add your site to Cloudflare:
Faster loading of websites: Cloudflare has servers across the globe which cache the content of your website. This means that when a user goes to your site, they will be able to access the information from the server close to their location, which results in faster loading times.
Improved Website Security: Cloudflare provides a variety of security options that include DDoS security, SSL/TLS encryption, and bot mitigation. These features can assist in protecting your site from malicious attacks.
Increased Reliability of Websites: When your site experiences downtime, Cloudflare can serve a cached version of your site to users while you work on the problem.
Now that you know the benefits of linking your site to Cloudflare, let’s discuss how to host a website on Cloudflare.
Step 1: Sign-Up to Cloudflare
When it comes down to how to set up Cloudflare, you are going to need an account. So the first step is to sign-up with the company for an account. To sign up, you must take these steps
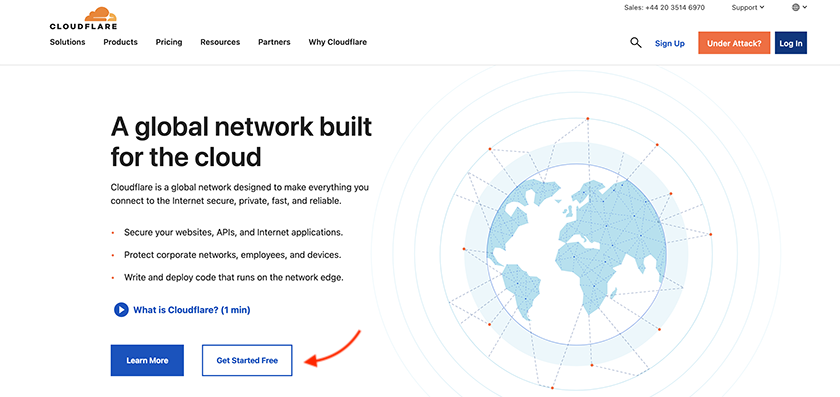
- Visit www.cloudflare.com and click on “Sign Up” at the top-right corner or click on the “Get Started Free” button.
- Fill in your email and then create your password.
- Select “Create an Account.”
Step 2: Add Your Website
After you’ve signed up with Cloudflare, the next step is to include your website in Cloudflare. To complete this process, you must comply with these instructions:
- Simply click on the “+ Add Site” button at the top right corner.
- Enter the domain name of your website into the “Enter Domain” field.
- Simply click on “Begin Scan.”
Cloudflare will check the DNS records of your site and show them in the following step.
Step 3: Change Your DNS Record
In this stage, Cloudflare will display the DNS records it discovered for your site. When you buy a cloud hosting service, the hosting provider gives you a DNS to set up your website and web-based applications. To connect to Cloudflare, you’ll need to modify your DNS records on your website to be linked to Cloudflare servers. To accomplish this, you must comply with these instructions:
- Examine the DNS record that Cloudflare has found for your website.
- Click on the orange cloud icon on top of each DNS record you wish to allow by using Cloudflare.
- Simply click on the cloud in grey that is next to any DNS record that you would like to block Cloudflare.
After you’ve made your choices, click “Continue.”
Step 4: Choose a Plan
Cloudflare provides a range of different plans, including a no-cost plan that can be tailored to meet the needs of different customers. To choose a plan, take these steps
- Select the plan that is most suitable for your requirements.
- Input your payment details. If required, enter your payment information.
- Select “Continue.”
Step 5: Update Your Name Server
The last step is to modify the name server on your site so that they are pointing to Cloudflare nameservers. To accomplish this, follow these steps:
- Cloudflare will show the name servers you must use to host your site.
- Log into your domain’s registrar’s site and change the name servers of your site to the ones supplied by Cloudflare.
After you’ve updated the name server, it could take up to 24 hours to see the changes in effect.
Conclusion
Making your website part of Cloudflare is an easy process that will provide many advantages, including speedier loading times, improved security, and better reliability. In this article, we discussed how to add a website to Cloudflare, and if you follow the steps mentioned above, you will be able to connect your website with Cloudflare and enjoy these advantages. Be sure to select the plan that is most suitable for your needs, and also change your DNS records and name servers according to the instructions.
If you have questions or require support, Cloudflare provides excellent support services, including a resource base and a community forum.
FAQs – How to add a Website to Cloudflare
Is Cloudflare an internet host?
There is no need to be; Cloudflare is not a web hosting service. It’s a Content Delivery Network (CDN) and security company that can help to improve website performance and guard against cyberattacks.
Is Cloudflare free?
Cloudflare provides a free plan that includes the basic CDN as well as security. They also have premium plans that have more advanced features.
How long will it take to wait for Cloudflare to begin working?
It could take as long as up to 24 hours to allow the modifications to be in effect and allow Cloudflare to begin the process of caching your site’s content.
Can I utilize Cloudflare with any other site?
Cloudflare can be utilized on any website that has a domain that is custom and has access to DNS records.
Does Cloudflare impact my site’s SEO?
Cloudflare is a good choice to improve the performance of your website and can also affect SEO. Furthermore, Cloudflare provides SSL/TLS encryption that can enhance your site’s security as well as the search engine ranking.


Leave a Reply