WordPress is among the most well-known CMS, which is why it is frequently targeted. Anyone can easily locate your default login pages by simply adding the words ‘wp-admin’ or ‘wp-login.php. Hackers employ various methods to hack into your site, and one of the most popular is the ‘brute-force attack.’
This way, hackers attempt to gain access to your site by getting the login password of your website. One method to protect the login pages of your site is to alter the login URL on your website.
In this WordPress tutorial, we’ll discuss how to change WordPress login URL with a plugin and how to change WordPress login URL without a plugin. Before you begin making any changes, make sure you take backups of your files. Backups will protect you from catastrophe.
Importance of the WordPress Admin URL
After you’ve installed WordPress, it will grant access to your site’s administrator dashboard. Here you’ll be able to configure your website as you want and alter the things you want to change.
This wouldn’t be possible without being able to log in to the WordPress dashboard. The login page hinders other users from accessing the administration “side” of your WordPress website.
It is nearly impossible to have complete control of your blog/site when you don’t have access to the administrator area.
Where exactly is the WordPress login page?
How to Locate Your WordPress Login Url
It is possible to access the WordPress login page by adding /login, /admin, or /admin or wp-login.php at the end of the URL of your website.
If you installed WordPress on a subdirectory (www.yoursite.com/wordpress/) or subdomain (blog.yoursite.com/), add one of the three paths at the very end of your URL, such as www.yoursite.com/wordpress/wp-login.php or blog.yoursite.com/wp-login.php
How to Change WordPress Login URL without a Plugin
So, how can you go into WordPress and change the admin panel link? This can be done either by buying one of the best WordPress hosting services and asking them to do it for you or by changing the core files of WordPress. Prior to doing anything else, it’s a good practice to back up the current version of WordPress.
Step 1. Download your wp-login.php File
Your wp-login.php file is the one that contains the code used to create the login page for your site. Therefore, you’ll have to edit the file in order to alter your login’s URL. Keep in mind if you buy secure WordPress hosting, you may not have access directly to your files unless you are granted access. For the sake of this WordPress tutorial, let’s picture you have full control over your host.
First, you must open your site’s file manager and then locate the folder titled “public_html.”
Then, on the left-hand sidebar of the file manager, select open the public_html folder.
There, you can find the wp-login.php file and save it to your computer.
Step 2. Find and replace the old Login URL
When you download the wp-login.php file, you can open it within your text editor in order to see the code.
Then, look through the directory for each instance that contains “wp-login” and replace it with a new login URL. For instance, the current URL will be “wp-new,” but you must choose a name that is specific to your site and one that you are able to remember quickly.
After you’ve made the changes, you can save your file. After that, change the name of your file using the new URL that you have used, which is wp-new in our instance.
3. Upload Your new Login File
Once your login file is updated with an updated login URL, it’s time to upload it back to the WordPress website.
Go over to the file manager again, add a fresh file, and then choose the login you customized at the beginning of the process.
Step 4. Register a New Login File URL with The Login URL filter hook
After you’ve uploaded your login file, then the second step to follow is to sign up for the new URL for your login file by using the “login_url” hook.
This function lets you use any page you want to use as a login page if it contains the login form. For instance, you can create a new page with the login form to allow users who are registered to sign in.
To accomplish this, you must open the theme’s function file and copy this code into it:
/*
* Change WP Login file URL using “login_url” filter hook
* https://developer.wordpress.org/reference/hooks/login_url/
*/
add_filter( ‘login_url’, ‘custom_login_url’, PHP_INT_MAX );
function custom_login_url( $login_url ) {
$login_url = site_url( ‘wp-new.php’, ‘login’ );
return $login_url;
}
Save the file and continue to the next stage.
Step 5. Check Your New Login URL
Before you remove the default login file on your WordPress site, you need to first test the new WordPress admin panel URL you created. To test it, enter your website’s URL into the address bar of your browser, and then add your new login URL at the end.
For example, our complete login URL could appear like this:
example.com/wp-new.php
Then, navigating to the page displays that we have a WordPress Login Form.
If you notice the same problem, the newly created WordPress administrator login link will work, and you will be able to move into the next phase.
Step 6. Remove the original Login File
The final step in this method is to remove the current wp-login.php file from your website’s file system. This will remove your default login pages on your site, and in the event that anyone attempts to log in with that URL, they’ll get the page with 404 errors.
Prior to deleting the file, you could download the original to use as an emergency backup should something go out of the ordinary in the near future. After you’ve completed that, you can delete the file using your folder manager.
If you try to locate your initial login page will encounter an error message that reads 404.
How to Change WordPress Login URL with Plugin
The most popular WordPress security plugins like All In One WP Security & Firewall and iThemes Security let you use the custom WordPress login URL so that no one else can access the WordPress login form on /wp-login.php and the wp-admin URL.
Within iThemes Security, for example, the standard WordPress username URL is altered within the Hide Backend section of the Advanced Settings section.
If you’re not in need of every bell-and-whistle all-in-one security software offer, then you might want to think about a specific WordPress log-in solution. There are a variety of great login options in the WordPress plugin directory, including WP Hide & Security Enhancer, Change wp-admin login, and LoginPress.
In order to answer how to change WordPress admin login URL with a plugin, we’d like to use WPS Hide Login.
Step 1. Install and activate WPS Hide Login
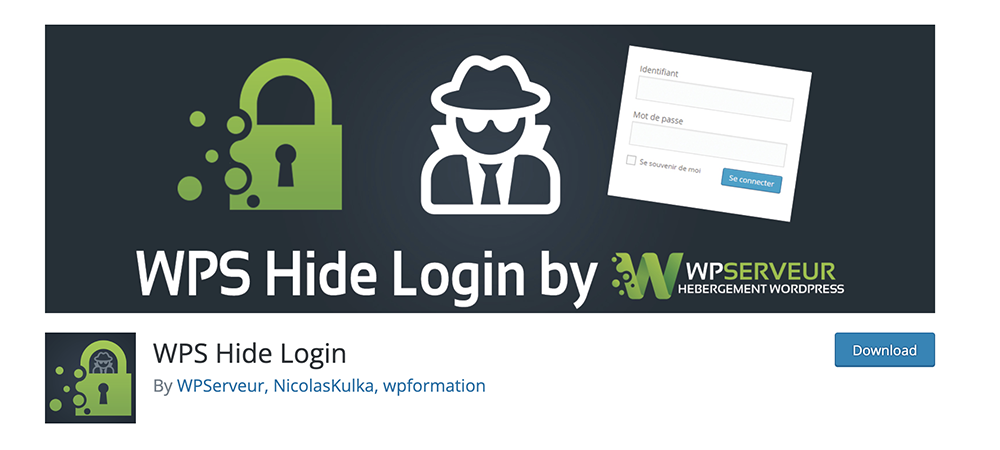
WPS Hide Login can be downloaded from the official WordPress plugin or installed within the plugin area of the WordPress administrator area. After WPS Hide Login has been installed, you must activate the plugin.
Step 2. Enter Your Login URL
When WPS Hide Login has been enabled, you will see an additional section at the lower part of the WordPress General Settings page. In the login URL field, type in the new URL to the login screen.
Step 3. Enter Your Redirection URL
In the redirection URL field, type in the URL path you would like to redirect users to when they try to login into your website with wp-login.php and the wp-admin URL.
This is all you have to do in order to use the WPS Hide Login.
Conclusion
In this article, we talked about how to change WordPress admin login URL with and without the use of a plugin. Keep in mind you can also change WordPress admin URL from the database that your WordPress website is saved on. However, since that is a bit more advanced, we decided to mention and talk about the methods that are simpler in this WordPress tutorial.


Leave a Reply