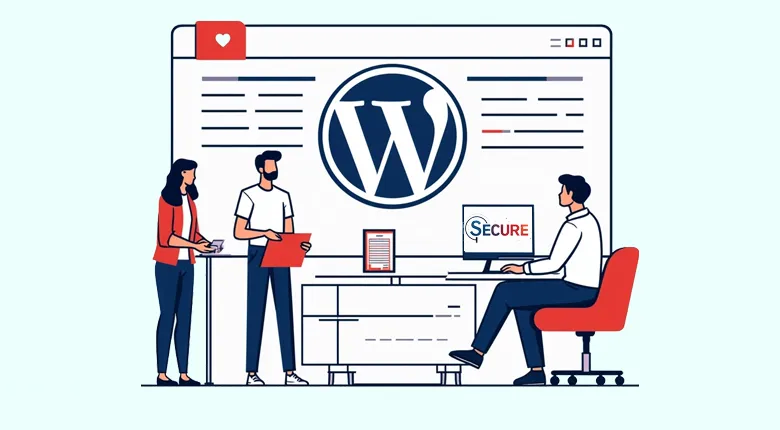
Your WordPress site is more than just a digital storefront—it’s the backbone of your online presence, your reputation, and often your livelihood. With millions of WordPress sites targeted by hackers every year, it’s no longer a matter of if you’ll be targeted, but when. From brute-force login attempts to sophisticated malware injections, attackers constantly search for the weakest links—and if your site isn’t locked down, you could be next.
That’s why implementing strong, actionable security measures is essential. In this guide, we walk you through 30 practical strategies based on the 10 must-do steps to Secure Your WordPress Site from Hackers. Whether you’re a beginner or a seasoned developer, these tips will help you build a fortress around your website—covering everything from secure hosting and plugin management to advanced monitoring, backups, and firewall protection.
Why It’s Critically Important to Secure Your WordPress Site from Hackers
With WordPress powering over 40% of all websites worldwide, its popularity makes it a prime target for cybercriminals. From personal blogs to enterprise-level eCommerce sites, the threat of being hacked is not a matter of “if” but “when” if proper precautions aren’t taken. That’s why understanding the importance of security is step zero in protecting your WordPress site.
The damage from a successful attack goes beyond losing content or functionality. Sensitive data may be stolen, malicious redirects could harm your visitors, and you might even face penalties from search engines. In many cases, users only realize the value of security after facing the consequences of a hack. Prevention is not just cheaper—it’s smarter.
Also, think about your site’s reputation. Visitors who land on a compromised website will never trust it again. Even if you clean up the mess, the psychological damage remains. Securing your WordPress site from hackers isn’t just technical hygiene—it’s critical for the longevity and trustworthiness of your digital presence.
The Hidden Financial and Reputational Costs of a Hacked WordPress Website
Many people underestimate the true cost of a hacked website. It’s not just about losing a few pages or having to re-upload a theme. Depending on the severity, a breach can result in days of downtime, legal liabilities, loss of customer data, and fines under regulations like GDPR. Even basic recovery services from professionals can range from a few hundred to thousands of dollars.
But perhaps the most damaging consequence is the long-term hit to your brand’s credibility. Visitors might associate your domain with malicious behavior or assume your business is careless about data. Especially if you run an e-commerce or membership-based platform, trust is everything—and it’s very hard to rebuild once lost.
Additionally, search engines like Google are quick to detect hacked sites and may display warnings or completely delist them from search results. This can lead to a steep decline in organic traffic overnight. So, while security tools and services may seem like extra costs, they are actually small investments that protect your much larger business potential.
Immediate Steps to Take When You Discover Your WordPress Site Has Been Hacked
Realizing that your WordPress site has been hacked can be overwhelming, but acting fast can minimize the damage. The first thing you should do is isolate the site. If your host provides a “maintenance mode” or a way to temporarily suspend the site, use it to prevent further damage or spread. Then, begin identifying the nature and extent of the breach.
Use a combination of malware scanners and security plugins to analyze your WordPress core files, themes, and plugins. Check your file manager for any strange scripts, recently modified files, or new admin users. Create a full backup of your current site (yes, even in its compromised state) so you can investigate or share it with a security professional later.
Once you’ve located the infected files or backdoors, clean them manually or with the help of tools like Wordfence or Sucuri. Immediately change all passwords, update WordPress and plugins, and reinstall clean versions if needed. If your site was blacklisted by search engines, submit a reconsideration request after the cleanup. Also, notify your users if any personal data may have been exposed—transparency matters.
Warning Signs That Your WordPress Site Might Be Under Cyber Attack
Sometimes, a hacked website shows clear, dramatic symptoms—like defaced pages, sudden redirects to suspicious sites, or browser warnings. But more often, the signs are subtle and easily missed. For instance, you might notice a sudden drop in site speed, unexplained changes to your content, or an increase in failed login attempts.
Other signs include strange files in your WordPress root folder, unexpected admin accounts, or even emails from users complaining about being redirected. You should also regularly check your server’s access logs for unusual IP activity or traffic spikes at odd hours. These small red flags can be early indicators of a much larger problem.
If you’re not actively monitoring for these signals, you might not even realize you’ve been hacked until Google flags your site or your hosting provider takes it offline. That’s why proactive monitoring using security plugins and dashboard alerts is essential. Catching an attack early gives you a much better chance of stopping it before it does lasting damage.
Debunking Common Myths That Prevent Site Owners from Securing Their WordPress Sites
One of the biggest misconceptions about WordPress security is that only large or high-traffic sites get targeted. In truth, hackers often go after smaller sites because they’re more likely to lack proper defenses. Automated bots scan the web looking for known vulnerabilities—it doesn’t matter whether your site has 10 visitors a day or 10,000.
Another myth is that “security plugins” alone are enough to protect your site. While tools like Wordfence or iThemes Security are essential, they’re only part of a multi-layered security approach. If your hosting is weak, passwords are bad, or plugins are outdated, even the best firewall won’t save you.
Some users even assume that WordPress itself is insecure, which couldn’t be further from the truth. The WordPress core is maintained by a large team of dedicated developers and is generally very secure. The real issue arises from poor user practices like using pirated themes, neglecting updates, or giving admin rights to untrusted users.
How a Secure Website Improves SEO Rankings and Builds Visitor Trust
Did you know that Google includes website security as a ranking factor? Sites that use HTTPS are given priority in search results, and those that are compromised or flagged for malware are severely penalized. That means a secure site doesn’t just protect you from hackers—it actively helps your SEO performance.
From the visitor’s perspective, a secure site builds immediate trust. That little padlock icon next to your URL isn’t just aesthetic—it’s a signal that their data (and time) is safe with you. If users see warnings or get redirected to shady pages, they’ll bounce immediately and probably never come back.
Furthermore, a secure site reduces bounce rates, improves time on site, and encourages repeat visits—all of which signal to Google that your content is valuable and trustworthy. So, while you may be thinking of security as a technical backend concern, it’s a powerful driver for both search visibility and user engagement.
Step 1: Choose a Secure and High-Performance WordPress Hosting Provider That Prioritizes Protection
The very first step in protecting your WordPress site is choosing a reliable and security-focused hosting provider. Many site owners underestimate the importance of hosting, thinking it only affects speed or uptime. But in reality, your hosting environment is the first line of defense against hackers and malware. A weak host with outdated server software, poor firewall configuration, or shared vulnerabilities can make your site an easy target.
Look for hosting providers that offer features like malware scanning, automatic updates, server-level firewalls, and DDoS protection. Managed WordPress hosting, for example, takes care of many technical responsibilities for you, offering optimized security configurations out of the box. Providers like Rackset also offer Windows Hosting, cPanel Hosting, VPS, and Unlimited Email Hosting, giving you more flexibility while keeping everything under one secure umbrella.
Moreover, a good host offers instant support, regular backups, and fast patching in case of zero-day vulnerabilities. These small differences can make a massive impact when your site is under threat. The best time to think about secure hosting is before a breach ever happens—so choose wisely and invest in your infrastructure from day one.
Step 2: 
One of the most common reasons WordPress sites get hacked is because the software hasn’t been updated. WordPress core, plugins, and themes receive regular updates that not only add features but also patch known vulnerabilities. If you ignore those updates, you’re essentially leaving the door wide open for attackers who are actively scanning for outdated installations.
Outdated plugins and themes are especially risky because they are often created by third-party developers and may be abandoned or poorly maintained. A single outdated plugin with a known vulnerability can be enough for a hacker to gain full control over your site. That’s why enabling automatic updates (where safe), or checking for updates weekly is a non-negotiable part of WordPress security.
Also, don’t forget to remove unused or inactive themes and plugins. Even if they’re deactivated, they still sit on your server and can be exploited. Always test updates on a staging site first if you’re worried about compatibility issues—tools like WP Staging can help you do that safely.
Step 3: Use Strong, Unique Admin Usernames and Passwords to Block Brute Force Attacks
It might sound basic, but weak credentials are still one of the top reasons WordPress sites get hacked. Many site owners still use “admin” as their username and simple passwords like “123456” or “password.” Brute force bots love these types of sites and will try thousands of combinations every minute until they succeed—unless you’ve taken steps to secure your login.
Start by changing your default “admin” username to something unique. Then use a password manager to generate and store a strong password with at least 12–16 characters, including symbols, numbers, and both uppercase/lowercase letters. Tools like LastPass or Bitwarden make it easy to manage complex logins for multiple sites.
In addition, implement two-factor authentication (2FA) to add another layer of protection. Even if someone manages to guess your password, they’ll still need a second code from your mobile device to log in. Plugins like Google Authenticator, WP 2FA, or Duo can make this process seamless and user-friendly.
Step 4: Install a Comprehensive WordPress Security Plugin for All-in-One Protection
No matter how tech-savvy you are, it’s impossible to monitor every threat manually. That’s where security plugins come in. These tools act as 24/7 security guards for your site—scanning files, blocking suspicious IPs, limiting login attempts, and alerting you when something goes wrong. They’re essential even for developers and experienced site managers.
Popular plugins like Wordfence, Sucuri, iThemes Security, and All-in-One WP Security & Firewall offer robust free and premium features. Wordfence, for example, comes with a powerful firewall and malware scanner that works out of the box. Sucuri adds features like CDN-level WAF protection and post-hack cleanup services.
Just installing a plugin isn’t enough—you need to configure it properly. Make sure to set up email notifications, enable brute-force protection, and whitelist your own IP addresses. Also, avoid using multiple security plugins at the same time, as they can conflict and create vulnerabilities instead of closing them.
Step 5: Enable HTTPS by Installing an SSL Certificate to Encrypt User Data and Boost SEO
Switching your WordPress site to HTTPS is no longer optional—it’s mandatory for both user trust and SEO. An SSL certificate encrypts all data exchanged between your server and visitors, protecting sensitive information like passwords, payment details, and personal messages from interception.
Google now marks HTTP-only sites as “Not Secure” in Chrome, and having an SSL certificate is officially a ranking signal. That means switching to HTTPS not only protects your users but can also help your site appear higher in search results. Most hosting providers—including Rackset—offer free SSL via Let’s Encrypt, or premium certificates with added features.
After installation, use a plugin like Really Simple SSL to redirect all your content to HTTPS. You should also update your internal links, media files, and canonical URLs to avoid “mixed content” warnings. Don’t forget to update your sitemap and re-submit it in Google Search Console for proper indexing.
Step 6: Regularly Back Up Your WordPress Site to Prepare for Worst-Case Scenarios
Even the most secure websites can be compromised. That’s why backups are your ultimate safety net. If your site gets hacked, crashes, or gets deleted accidentally, a backup allows you to restore everything to a working version within minutes—no panic, no loss of business, no starting from scratch.
There are many great backup plugins like UpdraftPlus, BlogVault, and BackupBuddy that let you schedule daily, weekly, or real-time backups. You can also store backups off-site using Google Drive, Dropbox, or Amazon S3 to ensure they’re safe even if your hosting account gets compromised.
Make sure to test your backups regularly. A backup that doesn’t restore properly is just as useless as no backup at all. And don’t rely solely on your host’s automated backups—download your own copies too. Think of backups like an insurance policy: you hope you’ll never need it, but you’ll be grateful if you do.
Step 7: Set Up a Web Application Firewall (WAF) to Block Attacks Before They Reach Your Site
A Web Application Firewall (WAF) acts as a protective shield between your WordPress site and incoming traffic. It monitors, filters, and blocks malicious requests before they even reach your server, preventing common attacks like SQL injections, XSS, brute-force logins, and bad bots. Without a WAF, your site is exposed to automated attacks scanning thousands of URLs every day.
There are two types of WAFs: local (plugin-based like Wordfence) and cloud-based (external services like Sucuri or Cloudflare). Cloud-based WAFs are generally more powerful because they stop threats before they ever touch your hosting environment. They can also reduce server load, speed up your site with CDN integration, and provide DDoS protection.
Setting up a WAF might sound technical, but many providers offer one-click setups or WordPress-specific integrations. Whether you go with a plugin or an external service, enabling a WAF is one of the most effective ways to drastically reduce your attack surface and gain peace of mind.
Step 8: Harden Sensitive Files Like wp-config.php and .htaccess to Prevent Unauthorized Access
Some files in your WordPress installation are more valuable—and more vulnerable—than others. The wp-config.php file contains your database credentials, security keys, and other sensitive data. If a hacker gains access to it, they can potentially take over your entire site. Similarly, the .htaccess file can control critical server behavior and access permissions.
To protect these files, you should move the wp-config.php one level above the public root directory if your server supports it. Also, restrict file permissions—400 or 440 are usually good values to prevent unauthorized reading or writing. In .htaccess, you can explicitly deny access to these files using simple Apache rules.
Additionally, disable file editing in your WordPress dashboard to prevent any malicious changes through the admin area. Just add define(‘DISALLOW_FILE_EDIT’, true); to your wp-config.php file. These hardening techniques won’t stop hackers alone, but they add powerful roadblocks that make attacks much harder to succeed.
Step 9: Control User Roles and Capabilities to Minimize Internal Security Risks
Not every user on your WordPress site needs full administrative access. One of the most overlooked security best practices is managing user roles and capabilities properly. Giving unnecessary access increases the chances of accidental changes, plugin deletions, or even intentional sabotage in case of a disgruntled employee or freelancer.
WordPress has built-in roles like Administrator, Editor, Author, Contributor, and Subscriber. You can also customize these roles using plugins like User Role Editor or Members. The principle of least privilege should always apply: only give users the permissions they absolutely need to do their job.
It’s also a good idea to perform regular audits of your users, especially if your team grows or changes frequently. Remove old accounts that are no longer in use, and enable 2FA for higher-privilege users. By reducing the number of people who can make major changes, you minimize the risk of accidental or intentional compromise.
Step 10: Set Up Ongoing Monitoring and Activity Logs to Stay Alert to Suspicious Behavior
Once your WordPress site is live and secured, the job isn’t done—you need to keep an eye on it. Monitoring tools can help you detect suspicious activity like unauthorized logins, plugin changes, or file modifications in real time. If something strange happens, you want to be the first to know—not your visitors.
Plugins like WP Activity Log, Sucuri Security, and Wordfence come with built-in logging and notification systems. You can configure them to send email alerts for critical actions such as failed logins, theme changes, or file edits. These logs are not just useful for security—they can help with troubleshooting bugs or content issues too.
Make it a habit to review your logs weekly or monthly, depending on how active your site is. If you’re using Rackset’s managed hosting, you may also have access to server-level monitoring tools and error logs that provide deeper insights. Ongoing visibility ensures that even the smallest red flags don’t go unnoticed.
Enable Real-Time Alerts and Scheduled Security Scans to Catch Issues Before They Spread
In the world of WordPress security, real-time detection is just as important as prevention. Even with firewalls, strong passwords, and safe hosting, something could still go wrong. That’s why setting up real-time alerts and scheduled scans is a must. These tools act like motion detectors, alerting you as soon as suspicious behavior happens.
Security plugins like Sucuri, Wordfence, and Jetpack Scan can be configured to run automatic daily scans of your files and database. They’ll alert you immediately if anything changes unexpectedly—like a new admin user, a modified core file, or the appearance of malware. This allows you to take action before the problem escalates.
In addition to real-time alerts, some tools let you perform deep scans on demand or schedule them during low-traffic hours. Combine this with uptime monitoring and performance checks, and you’ve got a powerful 24/7 security system—even if you’re asleep or away from your desk.
Use a Staging Environment to Test Changes and Security Updates Without Risking Your Live Site
One of the most professional practices in WordPress management is using a staging environment. This is a clone of your live site where you can safely test updates, new plugins, design changes, or security configurations without affecting real users. If anything goes wrong, your live site remains untouched.
Many hosting providers, including Rackset, offer one-click staging environments as part of their managed WordPress hosting plans. This allows you to preview everything—from design to performance to security—before pushing it live. It’s particularly useful when updating major plugins like WooCommerce or modifying .htaccess rules.
A staging site also gives you a sandbox to run malware scans or test WAF/firewall settings without real-world consequences. Think of it like a dress rehearsal before a major event—it helps ensure everything runs smoothly when it matters most. If you’re serious about site security, staging should be part of your workflow.
How Your Hosting Configuration Directly Impacts the Overall Security of Your WordPress Site
Most people think hosting is just about speed or uptime, but it’s also one of the biggest security factors. Your hosting configuration determines things like firewall rules, PHP version, file permissions, and whether known vulnerabilities can be exploited. Shared hosting environments, for example, often expose your site to risks from neighboring sites on the same server.
If your host doesn’t support basic security features like isolated file systems, malware scanning, or fail2ban for brute force mitigation, you’re already behind. Worse, outdated server-side software (like older versions of Apache or PHP) can create backdoors that hackers love to use. Managed hosting solutions usually keep everything patched and secure automatically.
That’s why it’s essential to choose a host that offers dedicated WordPress protections, including server-level firewalls, malware monitoring, and limited access to critical system files. With Rackset’s hosting solutions, for example, you can get optimized configurations tailored to WordPress, plus options like cPanel, VPS, and Windows Hosting—each with its hardened setups.
Why Using a Password Manager Is Essential for Securing WordPress Admin Credentials
A strong password is one of the easiest yet most neglected aspects of WordPress security. People often use weak or reused passwords out of convenience, not realizing how easily they can be guessed or cracked in brute-force attacks. This gets even riskier when admin credentials are shared among team members or stored in unsecured ways.
Using a password manager solves all of this. Tools like Bitwarden, 1Password, or LastPass generate highly complex, unique passwords for every site and store them securely behind a master login. You never need to memorize anything except one master passphrase—and even that can be strengthened with two-factor authentication.
Password managers also allow for secure password sharing, which is critical for teams. Instead of emailing or texting passwords (which is super risky), you can grant team members limited-time access to credentials without ever exposing the actual text. That means your WordPress admin remains protected—even as your team grows or changes.
How to Choose the Best Security Plugin for Your WordPress Site: Free vs Premium Options
The WordPress plugin ecosystem is huge, but not all plugins are created equal—especially when it comes to security. Choosing the right security plugin can mean the difference between peace of mind and endless cleanups. While there are dozens available, a few standout names offer comprehensive, trusted protection with years of development behind them.
Free plugins like Wordfence (basic version), All-in-One WP Security & Firewall, and iThemes Security Lite offer solid protection with features like login lockdown, file integrity checks, and limited malware scanning. But for advanced features like real-time firewall rules, country blocking, and automatic malware removal, premium upgrades are often worth it.
It’s important to choose a plugin that suits your specific needs. Are you running an e-commerce site? Look for WooCommerce compatibility. Need GDPR compliance? Check for audit logs and data control features. And most importantly, don’t install multiple security plugins—they can conflict and make your site even more vulnerable.
How to Get and Install a Free SSL Certificate for Your WordPress Site in Just a Few Minutes
An SSL certificate encrypts communication between your users and your site, ensuring sensitive data like passwords, credit cards, and contact forms stay secure. Luckily, getting an SSL certificate has never been easier or cheaper—many hosts (like Rackset) offer free SSL via Let’s Encrypt built directly into the hosting dashboard.
To install SSL, log into your hosting control panel (like cPanel or Plesk), find the SSL/TLS section, and activate your certificate. In most cases, it’s just a single click. After activation, use a plugin like Really Simple SSL to automatically redirect all your traffic to HTTPS and fix any mixed content warnings.
Once set up, make sure your internal URLs, canonical tags, and sitemap reflect HTTPS. Then, re-submit your site in Google Search Console to ensure your secure version is indexed properly. Not only does this improve trust with your users, it also gives your site a small SEO bump as well, since HTTPS is a Google ranking signal.
Top Backup Plugins for WordPress Security and How to Use Them Effectively
A good backup system is like insurance for your website. You hope you never need it, but if disaster strikes, you’ll be incredibly thankful it’s there. There are many excellent backup plugins available, both free and premium, that allow you to schedule automatic backups, store them off-site, and restore them with a click.
UpdraftPlus is one of the most popular choices, offering easy integration with Google Drive, Dropbox, Amazon S3, and other cloud services. BlogVault and BackupBuddy are great premium options that also provide staging environments, migration tools, and real-time backups. Many managed hosting providers also include built-in backup systems.
No matter which plugin you choose, be sure to follow best practices: test your backups monthly, store them in multiple locations, and never rely on just one copy. Also, configure your backups to include your database, plugins, themes, and uploads folder—so your entire site can be restored from scratch if needed.
Comparing Cloudflare and Sucuri: Which Web Application Firewall Is Best for WordPress?
Both Cloudflare and Sucuri are big names in the world of WAF (Web Application Firewall) services, and both offer excellent protection for WordPress. But depending on your site’s needs, one may be better suited than the other. Cloudflare is a performance-focused CDN with added security layers, while Sucuri is a security-first platform built specifically to stop attacks.
Cloudflare excels in speed, global caching, and DDoS mitigation. It’s especially useful for high-traffic sites that need load balancing and reduced latency. Their Pro plan includes a WAF with OWASP rulesets and protection against SQLi, XSS, and more. However, you’ll need to configure DNS settings to use it fully.
Sucuri, on the other hand, includes a full malware removal service, virtual patching, blacklist monitoring, and post-hack cleanup—even on the basic plan. It’s ideal for WordPress users who want “set it and forget it” protection. Ultimately, if security is your top concern, go with Sucuri. If performance and CDN integration matter more, Cloudflare might be your better bet.
Advanced Security Measures Every WordPress Developer Should Know and Use in Production Sites
When you’re building WordPress sites professionally, security should be built into every stage of development. Beyond the basics like strong passwords and updates, developers should be implementing deeper protections such as nonce verification, sanitizing user inputs, escaping outputs, and limiting REST API exposure. These techniques help prevent the most common attacks like Cross-Site Scripting (XSS) and SQL injection.
Another key strategy is to disable XML-RPC if it’s not in use. This legacy feature is frequently targeted for brute force and DDoS attacks. Similarly, removing or limiting access to /wp-json/ endpoints ensures that bots or hackers can’t easily enumerate your plugins, themes, and users. Code-level security means thinking proactively and limiting what can be accessed or manipulated from the outside.
Finally, developers should consider using security headers (like Content Security Policy and X-Frame-Options), as well as implementing file integrity monitoring during deployments. Tools like WP-CLI, Git version control, and staging environments should be part of your workflow—not just for efficiency but for safe rollbacks if anything goes wrong. Remember: secure code is fast code, and fast code is trusted code.
Why Managed WordPress Hosting Offers Better Security Than Shared or DIY Hosting Solutions
Managed WordPress Hosting is more than just a convenience—it’s a serious security upgrade. These services are built specifically for WordPress, meaning every layer of the stack, from server OS to caching to file permissions, is optimized to protect your site. Providers like Rackset offer not just performance boosts but also automatic updates, malware scanning, and hardened environments out of the box.
In contrast, shared hosting environments often leave you vulnerable to what’s known as “cross-site contamination.” If another site on your server gets hacked, your site could be compromised, too. You also typically have to manage your backups, updates, and security tools—leaving lots of room for human error.
With Managed Hosting, you’re offloading those responsibilities to a team of experts who monitor your site, patch security flaws, and react to threats before they become disasters. Especially for businesses or eCommerce sites, this level of protection is not a luxury—it’s a requirement. It also saves you time, which you can invest into growing your brand, not fighting malware.
How Limiting Access and Enforcing the Principle of Least Privilege Can Save Your Site
One of the most underrated yet critical aspects of WordPress security is access control. The more people who have administrative access, the more risk you’re introducing—either through careless mistakes or malicious intent. The principle of least privilege (PoLP) means only giving users the minimum permissions they need to do their job.
For example, a blog contributor doesn’t need the ability to install plugins, and a customer support agent shouldn’t be able to edit themes or code. You can manage this using built-in roles or refine it further with role management plugins like Members or User Role Editor. These tools let you customize access down to individual capabilities like “upload_files” or “edit_others_posts.”
Beyond roles, implement login IP whitelisting, two-factor authentication, and user session timeouts. Also, review user activity logs regularly to identify suspicious behavior. You wouldn’t give every employee keys to the server room, so don’t give every WordPress user access to your site’s control panel.
How to Safely Clean Malware and Restore a Compromised WordPress Website Step-by-Step
When your WordPress site gets hacked, it’s tempting to panic—but taking calm, methodical steps is the best way to recover. First, isolate the site: take it offline, notify your hosting provider, and back up the current state for analysis. Then begin scanning your entire WordPress directory using malware detection plugins like Wordfence or external scanners like VirusTotal.
Next, identify and remove malicious code from core files, themes, plugins, and the database. Sometimes, hackers leave hidden backdoors that can re-infect your site even after a cleanup, so it’s important to be thorough. If you’re not confident, use professional cleanup services like Sucuri or your Managed Hosting provider’s security team.
Once cleaned, update everything—WordPress core, all plugins, all themes—and change all your passwords. Reinstall core files manually if necessary to eliminate any corrupted code. Then submit your site for review with Google if it was blacklisted, and monitor it closely for the next few weeks. Consider this a wake-up call to harden your site better going forward.
The Ultimate Security Checklist to Fully Protect Your WordPress Site from Hackers
Once you’ve applied all the best practices, it’s important to review them regularly with a solid checklist. Think of it as your WordPress site’s security health report. This checklist should include core tasks like keeping WordPress, plugins, and themes updated, enforcing strong passwords, enabling two-factor authentication, and backing up your site daily or weekly.
It should also cover advanced practices like using a Web Application Firewall (WAF), limiting login attempts, protecting sensitive files like wp-config.php, and disabling file editing in the dashboard. Don’t forget to secure your database by using unique table prefixes and hiding your WordPress version. These small technical tweaks can be your secret weapon against automated bots and targeted attacks.
Print this checklist, bookmark it, or build it into your workflow. Revisit it monthly—or more frequently if your site handles sensitive customer data or experiences high traffic. A consistent checklist not only saves you time and stress but acts as an accountability tool for your team or clients, ensuring no security gap is left unguarded.
Creating a Long-Term WordPress Security Strategy to Minimize Future Risk and Downtime
Security isn’t a one-time task—it’s a long-term commitment. Creating a sustainable strategy involves setting up systems that evolve with your site. As you scale, add users, publish more content, or grow your eCommerce operations, your security needs change too. That’s why building an adaptable plan is essential for long-term success.
Start by automating what you can: schedule backups, auto-update plugins, and monitor uptime and activity logs. Document your security policies—who has admin access, how often passwords are rotated, what tools you use—and train your team to follow them. It’s also smart to schedule quarterly audits of your website security and performance.
In the end, the goal is to make security a normal part of your operations, not an afterthought when something goes wrong. Just like you update your marketing or SEO plans regularly, your WordPress security strategy should be reviewed and refined over time. By investing in the right tools, habits and hosting partners like Rackset, you create a site that’s built to last—and built to withstand attacks.
Conclusion
WordPress security is not just a technical task—it’s a strategic investment in your site’s future. By applying the techniques and tips in this guide, you create a layered defense that protects your content, your users, and your business from real-world threats. The key is consistency: updates, audits, backups, and monitoring must become regular habits.
Remember: a secure site is a trustworthy site. Visitors are more likely to engage, convert, and return when they know your site is safe. With the right hosting provider like Rackset, the right tools, and a proactive mindset, you can stay several steps ahead of hackers—and keep your WordPress site running smoothly, securely, and successfully.
Leave a Reply